Showing posts with label art. Show all posts

Thursday, October 17, 2013

The Conventions Club... Freebie Fall Friday is here again!

Holidays with our family are all about the kids! There is nothing like watching as they experience it all and create memories. It truly is the ultimate blessing. 

Last weekend we took all of these cuties to the pumpkin patch!


Now on to the Conventions Club! I would LOVE to take credit for this one, but I have to give it to my amazing 3rd grade bestie! She is crazy amazing, I'm tellin' ya. 

Last year we really felt like we perfected the way we teacher writing. The focus is on writing projects rather than allowing students complete freedom in writing. We were finding that allowing them too much freedom produced little to no writing and a lot of time wasted during workshop. By working through writing projects each child created a piece that they took through the entire writing process and they did this several times throughout the year. The quality and quantity of writing improved immensely. 

Still, there was one major element of their writing that was not improving. Conventions. We would conference with students, practice editing together, peer edit, use editing kits, songs, the list goes on. Still we would see lowercase letters at the beginning of sentences, missing periods and spelling errors of those no-excuse words. The editing they were doing on their rough drafts was not carrying over. So the Convention Club was established!

The Conventions Club is an exclusive club for students who are meeting or exceeding in the area of conventions on all final copies. 

Here is How it Works:

1. Any time students turn in a final copy that we grade the authors either stay in the club, are made a part of the club or removed from the club. 
2. We keep a poster up with the Club Rules and the names of the members. The members write their names on the laminated poster in Expo marker just in case they have to be erased.
3. When they enter the club they get a members card. If they are removed from the club they have to give up their card. 
4. If members are a part of the Conventions Club they receive the following privileges:
-A pen to write with! THEY LOVE THIS!
-5-10 minutes at the beginning of writer's workshop for a "fun" activity. It was always something simple like drawing or sometimes I will give them a word search or they get to play a partner game. It's also not every day, but when they are given this opportunity other students are working diligently on their editing skills :P

I know that it might seem like a bit much to have a club that kids are added to and removed from and everything is not necessarily "fair", but it has really worked. We have seen a huge difference. By the end of last year every student had been a part of the Conventions Club at one point and the list of names  in the club at the end of the year included almost every student. 

Remember that as the teacher you have the ultimate say in it all. The idea behind it is that authors will show consistent use of proper conventions. When you see them showing consistency reward them by adding them to the Conventions Club! If at any point a member was not showing consistency I would take the opportunity to conference with them and they would be removed from the club until they again showed proper conventions in all writing. We also made sure to make it reachable for all students. I had a couple of kids last year who were working on writing 3 complete sentences with a capital and period in each. If they were meeting this goal they were a member. The club should not be unachievable for anyone. :)

Here ya go! Happy Freebie Fall Friday!!
Click the picture to grab yours.
This comes with two posters and Convention Club member cards!


And because I am the featured blogger this week over at Teacher Blog Addict I have another little something for you!


This is a simple pumpkin glyph for when your littles just can't 
focus any longer on those days before all that candy!!

Continue the hop with All Things Apple


Then go grab more freebies over at TBA!


Thursday, January 24, 2013

Native Americans of the Northwest

I feel like I am always posting about art projects, but these days it is the only time I am free to snap some pictures! We have been studying Native Americans of the Northwest. To represent the tribes of the Coast we made totem poles and for Inland Valley we made woven mats (my favorite project I have done all year BTW). 

Each of us picked 3 animals to include on our totem. Based on the spiritual beliefs of the indians we chose animals that best represented us. After choosing our 3 animals we colored each with oil pastel. Once colored, the animals were glued to brown construction paper rolled into a tube. 


We displayed these in our school library for everyone to see. We went to the computer lab to create the information cards. Each student described their animal and why they chose each. 


This project was my absolute have! I was daring and did it with my kids before trying it out on my own. I know, and it actually went amazing. Click here for the original project and perfect step by step directions!


The project includes watercolors, painted leaf prints, measuring, cutting and weaving. Each project turned out fabulous and really challenged students artistically. 


Completed product! I bought the straw/grass from Craft Warehouse. I was able to get the leaves right outside my classroom, dry and all. By the time I was ready to find some long grass it was pouring. I opted to spend a few bucks. 


We have a Curriculum/Kidless day on Monday... I am so ready to have some time to plan. So many exciting things coming up... Prez day, Valentine's, our 100th day and I am sure I am forgetting something... oh ya Super Bowl!


Native Americans Linky

Saturday, December 1, 2012

Christmas time is here!!!

I love Christmas time... I mean LOVE IT!! I start listening to Holiday tunes well before Thanksgiving (with must protest from the hubs). My sweet boys birthday is 10 days before Christmas. Usually we go ahead and decorate it up right after Thanksgiving and then for his birthday I un-decorate a bit or hide a lot of it in the garage. As Conner is getting older (3- tear tear ;( ) I have decided that I want him to be able to have some separation between Christmas and his birthday. Christmas is such a special time to me and that is because of all the memories I have created over the years with my family. I want to create every memory every bit as special for both his birthday and Christmas. So, with much deliberation we will not be decorating until the night of the 15th after cleaning up quite the superhero extravaganza! Can't wait to get my bootay decorating so I'm hitting up Pinterest for every cutesy pie thing in sight!!


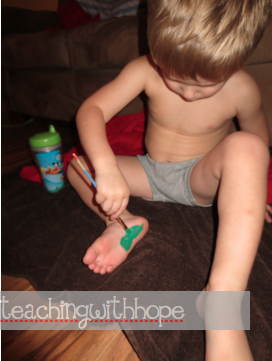
We started with a Footmas Tree Project. Conner loved painting his feet best. I let him paint his feet green and then I painted his sweet toesies red. 
I tell ya, this kid is always in his undies!


He painted the star on top himself... so artistic. 

This week my Thirds also made their first Holiday project. Luckily all of them celebrate Christmas but I did provide an alternate option of a snowman for kids who may Celebrate another holiday. Here are our close up Santas. Click here for an amazing tutorial with some technology thrown in too. 


This bald one is so cute! Gave me a good chuckle!!

Make this Holiday a special one!!


Tuesday, October 9, 2012

Halloween Art... and don't forget to enter the Label Maker Giveaway!

Does anyone else feel like the worst part about blogging is using the time that you would normally be stalking everyone else's blog to post to your own. These quick reads are not cutting it!

I am one happy girl right about now! We have a 3 day kid week this week, a 4 day work week annnnnnd my sweet niece turns two tomorrow and I am celebrating with a chocolate cupcake and a fat slice of pizza.... mmmmhmmm

Sure love this sweet girl!

We are painting tomorrow! Yes, painting... the first time. Had to rethink my original plan for Style Me Sunday. Never fails- we paint- I get painted on. 

I did a similar project last year but with a blue night sky. Decided we would Halloweeny it up a bit
Here is the final product

And this is how it's done!

Give kids orange (just a tiny bit- enough to fill bottom of dixie cup. This is way too much)

Also give them white. 

Step 1: Paint a white circle near the top of your paper. There is a white circle there at the top right but it's hard to see. 


Step 2: Dip your brush in orange (1 or 2 dips) mix it with the white. 
Step 3: Paint a circle around your white circle

Step 4: Repeat steps 2 and 3 again and again. Dip in orange, mix with white, paint circle around circle. 

Each time the orange gets darker and darker. 


Step 5: While the paint is drying give students black pieces. 
4- 3X3 squares, A 2 1/2 X 1 1/2 X 8 1/2 and a 3X6 inch piece

Tear the long skinny black piece to make it look like the ground. 
Using the 3X6 inch piece have the kids draw and cut a tree
Finally let them use the squares to make any halloween shapes they would like (cats, pumpkins, a gate, a witch, etc. )

Last: Once the painting is dry glue the pieces onto the painting!

Voila! 

Now don't forget to enter the giveaway for a Label Maker!! 
Just click here!
Good luck!


P to the S sorry about all the stupid + signs on my pictures.... so annoyed but also too lazy to go back and fix em