Showing posts with label DIY. Show all posts

Tuesday, August 5, 2014

$0 classroom door hanger


Good morning! And what a good morning it is.
Our power went out a few days ago and somehow short circuited our furnace. 
Long story short it is fixed and we have air conditioning again. 
So here I sit sipping my coffee with a still sleeping baby.
I don't know how I grew up without air conditioning! 
It's weird how going to sleep with all of the windows open and fans
 blowing made it feel that much more like summer though.
 It brought me back, for sure!

Being without air conditioning in this heat really wasn't all that bad- I am just being a whiner. 
The worst part was that baby girl had a hard time sleeping 
because her room gets so hot. She goes to bed before it starts to really cool off 
and sleeps with the door closed. At about 11 she would wake up and be ready 
to party in that sauna of a room. I on the other hand was not ready to join her party. 

With all this heat we have been having a lot of fun. We drove 4 hours to Wildlife Safari last week. 
It was pretty dang amazing. We could have literally reached out our window and touched a bear. We had to stop for animals in the road a dozen times and usually they would just walk right up to our window to say hello. 


This guy was quite a character :P


Now on to the point of this post. 
We have been shopping at Costco lately- best. place. ever. 
I had this gigantic cereal box that Josh of course thought I was crazy for saving. 
I wanted a cutesy classroom door sign, but I am really trying to be good 
and cut costs as we are headed back to school. 
There are always last minute things to buy that I don't think of 
in the couple of days before kids are back.  

I started with this. I used a ruler to draw a pencil shape and then cut it out. 
After that I painted the middle yellow, the eraser tip pink and the point tan. 
I let it dry for a little while and then drew the design for the zebra stripes with pencil. It was so much easier than it looks. There was no technique, just some messy wavy lines. I painted the zebra stripes and the polka dots, added a tip to the pencil and there you have it! 


 The next day I cut out the letters for my name using my silhouette cameo. 
I could not be happier with how it turned out! 
The best part is I literally paid nothing. 
I did find this design somewhere on Pinterest and took a screen shot with my phone.  
So if you know who made it please let me know so I can give them credit!! 


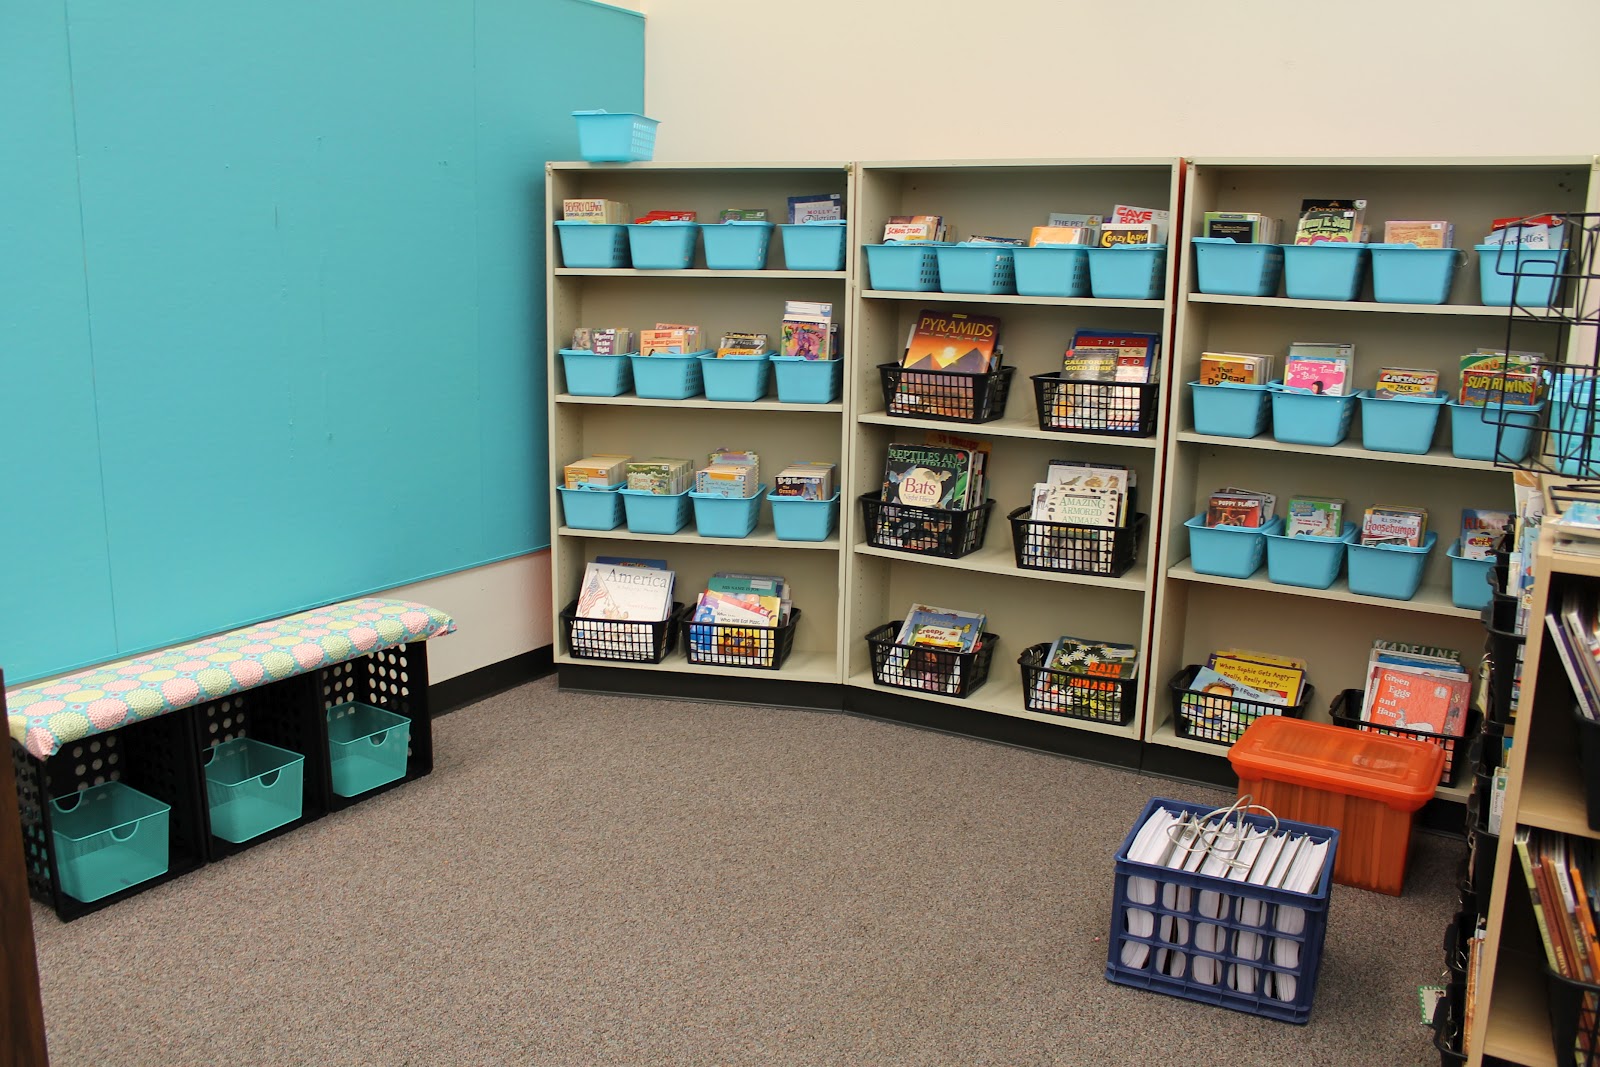
Here is my 50 mile long to do list for today. I am going into the classroom today and tomorrow hoping to get this all done. We go back in 3 weeks-ish and it is always my goal to be pretty much done the week before so that I can do nothing school related that week. I can't wait to post classroom reveal pictures later this week! 

Until then do NOT forget to enter the giveaway. 
It ends Sunday so you still have time to win one of 7 incredible prize packs.
 There are even a few door hangers- plus teacher planners, classroom banners and garlands 
and over a hundred TpT products! So get your booty over there. Just click HERE!


Monday, August 20, 2012

DIY Character Canvas Paintings

For this week's project I made Character Canvas Paintings. Now, before you stop reading and think it looks too difficult read on because I am not artsy fartsy at all so if I can get this done anyone can. This has been my favorite Made it Monday project! I hope you all love it as much as I do and find time to make a few for your classroom.


Materials:
Painting Canvases- I bought mine at Michael's Craft Store on Sale in a 10 pack for $10
Acrylic Paint

Directions:
1. Google pictures of your favorite book characters. Try to stick with simple pictures that do not have too much detail and focus mostly upon the main character. 
2. Once I had my characters picked out I then put each picture on my document camera and projected the picture onto my blank canvas. 
3. Use a pencil to trace the outline and details of your picture onto your canvas
4. Once you have all of the pictures penciled on to your canvases you are ready to paint
5. Use the acrylic paint and various size paint brushes to paint your characters. This part takes time and patience but I was able to complete all 6 of my characters in about 3 hours. (The toddler was at his Grammies! Otherwise I would not have been so brave and it probably would have taken me 10 hours).


I also made this no sew banner to go above the windows in my classroom. Click on the picture below to get the template. I printed the triangles on card stock, cut them, stapled them to ribbon at each corner and VOILA..... banner hung!


Click the picture to get your template!


Monday, August 6, 2012

Monday Made It and an Award!


This has been all over so nothing too new here but still adorbs and certainly post worthy. BTW my goal in my room this year has been no extra furniture at all. I mean no keeping furniture if there is any possible way to get rid of it. So that goes to show that I felt like this was worth making a new piece of furniture.


I already had the baskets and just wasn't sure what I would do with them. I also had the fabric left from what I used from my stool. See post here! The crates were $3.48 at target. I had a board in my garage from a broken shelf. I guess all that moving was good for something. The foam pad I used was also left over. See, my hubs is quite happy that I am getting rid of all this ecess stuff in our garage for all of my projects.... thank youuuuu Made it Monday!

See... Happy Hubs! 

And.... my Pinspiration came from....

In other news I was also nominated by Teacher Talk for the Versatile Blogger Award! Wooo Hooo! Thank you Tammi!


As acceptance of this award I would like to:

1. Say thank you to Tammi for gifting me with this award!
2. Encourage you to please visit her at Teacher Talk
3. Give you 7 randoms about myself because I just know how much you love hearing random junk about me, haha, I kid I kid!

Random #1 I believe myself to have the strangest sleeping position of any person alive and my son sleeps the exact same way. I feel like it is impossible to actually describe how we sleep. 

Random #2  I bite my nails :( I have tried so many times to stop and some days are better than others.

Random #3 Up until about a year ago I was hands down the most terrible cook of all time. I specifically remember Josh choking down several dinners just to keep me from crying.

Random #4 I have always always wanted to teach. My family still talks about how I would force my brothers and sisters to sign an actual contract to play school on Saturday from the hours of 8 a.m. to 2 p.m. (they always violated the contract!!!)
Random #5  I rarely watch TV unless the hubs has sports on and I am in the room but when I do it is hours and hours of nonsense reality T.V.


Random #6 I had this habit of saying "I refuse to do ______" and then less than 2 min. later saying "Okay, I'll do it" In reality when I said I refuse I knew I was going to do it all along.

Random #7 The only reason I enjoy staff meeting is so I can giggle and catch up with my darling teaching partner, Danni. She actually makes me look forward to it! Just love that girl!!
*Note: must take pictures of me and my team this year! :) 

4. For this award I would like to nominate...

Okay Okay that is all I am doing because there are so many teachers who have won this award and even some of the ones I have chosen may have, so yeah! :) 


Now to make this the longest post of all time I have some classroom pictures for you from day 2 of my summer work!
This is currently my desk

Will be math area with Daily 5 math choices, manipulatives and math board

Group area and little sitting area 

Shelf will all of my teacher books. My goal was to get them all on one shelf... barely 
Will be writing bulletin board and writing table

Word work area 
The library is coming along nicely

More library... I have too many books ugh

Mailboxes, had to get creative trying to make 36 of them


Monday, July 23, 2012

Getting in the right mind....


It is nearly August so I suppose I need to give in and start doing some super productive work to get ready for the school year!


At least I am having fun doing it! This week I am linking up (for the first time ever, I might add) with Fourth Grade Frolics for Made it Monday!


I saw this on Pinterest and thought it was both Genius and darling. Because, as some of you may know, sewing is a no no for me and I just don't have that kinda patience. The glue gun and staple gun are my two best friends!

Here is the final product and below you can see step by step how I completed this easy project!
Isn't it gorge :) And yes that's Conner in the background putting on his new rain boots

Super Easy Step by Step

1. You will first need to find a stool. Really any works. I found mine at salvation army for $8


2. Buy a can of glossy spray paint. I used black but of course, you can use any color. Take your stool outside or in your garage and completely cover it with the spray paint. Let it dry.
3. Once your stool is dried completely you will need a piece of foam large enough to cover the seat, a marker and scissors. I had extra foam laying around in the garage that used to be on top of a mattress.

-Turn the stool upside down on top of the foam and trace around it
-Then cut out the circle

4. Now you will need your fabric. I had some extra from other pieces that I am incorporating into my room. You don't need much. Lay the foam on top of your fabric and then the stool upside down on top of the foam. Use a pencil and ruler to trace a square around the stool that leaves about 2 1/2 - 3 in. on each side, enough to fold over and staple to the bottom of the seat. Once you have your lines traces you can move the stool and foam and cut your piece of fabric.
5. Once your fabric is cut lay your foam and stool back on top like shown above. Fold the pieces in so they are tight. Use a staple gun to staple your fabric into place all around your stool. Voila! You have a beautiful new stool for your classroom.